Saturday 15 November 2014

Review: Hourglass Ambient Lighting Blush Palette


Hi Guys!

I know, I know....she's a stunner! I am so in love with this blush palette it's unreal.
First of all let's look at the shades, from left to right we have Luminous Flush, a blue toned pink, my favourite of all three. Luminous Flush is extremely pigmented and rich, it has the stunning glow highlight that runs though all three but no sparkle or glitter at all. Be extremely sparing with this shade, it's easy to go overboard, I'd suggest using a dual fibre brush or really taking most of it off on your hand before applying to the face, build up slow.
In the middle we have Incandescent Electra, a warm coral with quite a white base, shimmer/glitter is detectable in this shade although it's slight. I think in the pan this shade looks most exciting but translates a little differently onto the skin, still a stunning blush but can come off slightly chalky if not blended well.
Lastly we have Mood Exposure, a purple/pink based bronzey shade with no shimmer/glitter, this shade can be used as blush or to give colour and structure all over the face (carefully).
All 3 blushes are rich and buttery with great colour payoff, they blend like a dream and give a radiant glow. I really can't fault this palette, the packaging is stunning, the blushes are encased in a bronze capsule style plastic pan with a large mirror inside and it has that satisfying "click" when closed. I haven't stopped reaching for it since I got it.


Have you got this palette? let me know your favourite shade.

Thanks for reading

Gem : )


Wednesday 12 November 2014

Wish List Wednesday - ZARA


Hi Guys!

I'm starting a new post series called Wish List Wednesday where every Wednesday (fingers crossed) I share my most coveted items from different shops or websites. I hope you enjoy! This week...Zara!! I am absolutely loving Zara at the moment so this was hard to refine. Links for each items are below.


Thanks For Reading!

Saturday 8 November 2014

Winter Wooly Neutral Nails


Hi Guys!!

So sorry I have been MIA the last week or so, we are moving country and things can get a little hectic! Anyhoo I'm back with a Winter Wooly Neutral Nails post for you, here are my favourites I'll be sporting this season.

From left to right:

Essie Smokin Hot - A rich purple based grey
Rimmel Salon Pro in Chic and Cheerful - A Cool Toned Greige
O.P.I. Tickle My Francey - A warm Pinky Greige
Zoya Kendal - A Pastel Lilac
Essie Sand Tropez - A Milky Sand Colour
O.P.I. I Don't Give A Rotterdam - A Blue Grey With Silver Shimmer


Let me know your favourite winter neutrals!

Thanks For Reading!

Gem x

Sunday 26 October 2014

Pop of Colour: Eye Makeup Look


Hi Guys

So it's sunday morning and my creative juices were flowing as I remembered my recent Kiko Cosmetics delivery. I thought I'd have a play with my favourite product from the bunch, Kiko Long Lasting Stick 8hr No-Transfer Eyeshadow (longest name ever!) in # 31, and create a fun but simple eye look for a night out, or in my case, a Sunday in. The Kiko Long Lasting Stick in 31 is a stunning cornflour blue with electric pink undertones that show through when the light hits it. Its such an unusual colour and I couldn't wait to try something out with it.


For base I used the This Works Perfect Look Skin Miracle to even out my skin tone and give myself a little colour, I took that over the face and down the neck.
To cover any redness (I have a rudolph nose) I mixed a little of the This Works Skin Miracle and some Laura Mercier Secret Camouflage on the back of my hand and used a large flat concealer brush to apply to areas that needed it.
I then used the Rimmel Stay Blushed Liquid Cheek Tint in 004 Sunkissed cherry for blush, blending that over the apples of my cheeks and up onto the temple a little to create some shape. For under the Eye I used the Maybelline Age Rewind Concealer. I then set the undereye with the Laura Mercier Secret Brightening Powder


I then moved onto the eye makeup. I started with the Kiko Long Lasting Stick and a pencil brush, coating the brush with the cream shadow stick I then applied it to the inner corner of the eye and out to the bottom lash line going about a third of the way across.
I then applied Eyeko Eye Do Liquid Liner to the top lash line all the way across finishing at the end of the lashes, no wing.
I then took the Kiko Cream Stick again and created a wing, continuing on from the Eyeko Liner, starting about a third of the way in from the outer corner. Be careful not to apply the Kiko Stick over the black liquid liner, you want to start it right on the line so the two join but do not overlap.
I then took the Eye of Horus  Goddess Smokey Eye Pencil in Black and tight lined the upper lash line and filled in the bare skin on the lower lash line, smudging out so it's not a sharp line. I also took a little onto the corresponding section of the water line and smudged with my finger to blend. I finished the look with lashings of Covergirl Clump Crusher Mascara and coated the outer corner lashes with Maybelline The Falsies Big Eyes Mascara for extra definition. You could apply false lashes to this look for extra wow factor, I'd recommend some half lash strips on the outer corner or some individual lashes applied only to the outer corner of the eye to keep that feline flick and elongated eye look.

I hope you like the look and let me know if you think you will have a go at recreating it! Follow me on Twitter and Instagram and send me pictures if you do!

Thanks for reading

Gem x


Tuesday 21 October 2014

Review: Neutrogena Hydra Boost


Hi Guys

I was so excited when I saw Neutrogena were releasing a Hydrating range, boasted to beat some of the higher end skincare products out there, I just had to give it a go. I have combination skin prone to dehydration so this range sounded perfect for me, lightweight, water based, moisturising etc...perfect! If you have read previous skincare posts of mine you will know Neutrogena is one of my favourite drugstore skincare brands so I had high hopes for this range. I decided to try the Hydro Boost Gel with SPF and the Night Concentrate.

I'll start with the Hydro Boost Gel. I have been using this in place of my regular serum and I'll say I haven't minded it. It sinks into the skin quickly and has enough slip in it that a small pump will do your entire face. It does have that slightly tacky finish due to the Hyaluronic Acid content but if you follow with a moisturiser that soon goes and leaves your skin feeling comfortable and hydrated. This range is quite highly fragranced so for those with fragrance phobia this is not for you, it also notes Alcohol Denat as one of the first 10 ingredients. I normally try to avoid anything containing too much fragrance and the nasty denatured alcohols but I wanted to try this range and it actually did not aggravate my sensitive skin at all. Its SPF of 15, while relatively low, is a great addition to the rest of my skincare layers. The largest portion of ingredients in this Gel after water (as it is a water based gel) are slip agents, silicone's and the alcohol denat, then a chemical sunscreen Phenylbenzimidazole Sulfonic Acid, more slip agents, PH balancers and THEN your Hyaluronic acid and olive extract followed lastly by several fragrance ingredients. 
Overall opinion on this product is, it's ok, it's nothing groundbreaking and far from a "wow" product but if your skin lacks moisture and your bank account lacks pennies then perhaps it's worth a try. If i had the option I would sooner reach for something like Hydraluron if it's around the same price range in your country as it packs more of a hydrating punch, doesn;t contain the nasty fragrances or alcohol and the Hydro Boost Gel offers nothing more beneficial ingredients-wise in my opinion. I have combination skin so I find that the amount of moisture these products provide is sufficient for me but fear a dry skin sufferer will not get enough from the Hydro Boost range.


I'll just say the night concentrate is much of a muchness also, same deal, lightweight water-based gel moisturiser but with the added negative of pot packaging, adding light contamination and a hygiene breach into the mix. Again the cream leaves a slightly tacky feeling after application but it seems to go away after a 30 minute-ish period and then just feels soft and looks nice and dewy. 

I will most probably finish up these products in all honesty as they don't seem to be doing me any harm, but exactly how much good they are doing is questionable. I just hate waste! At the end of the day they do seem to leave my skin feeling comfortable and hydrated but I do have to question how much of that is down to the hyaluronic acid and how much is down to lots of slippy, film forming ingredients. 

One word to sum up the Neutrogena Hydro Boost range?........MEH! 

Let me know if you have tried this range and what your thoughts were on it.

Thanks for reading!

Gem 

Sunday 19 October 2014

My Autumn/Winter Lips

Lancome L'absolu Rouge in 131

Hi Guys!!

So I know I'm cheating a bit here as it is certainly NOT Autumn in Australia at the moment, although today you might  be fooled into thinking it is, we have thunder and rain and yesterday we had hail the size of marbles! Anyhoo, it's spring here but I'm getting myself all excited for my return to the UK in December and a cheeky little trip to NYC so I decided to have a play around with my favourite berry lips. 

From Left to Right: NYX Butter Lipstick in Hunk, Lancome L'absolu Rouge in 131, Nars Velvet Matte Lip pencil in Damned, Boots 17 Lasting Fix Lipstick in New Black, Kiko Ace of Diamonds Lipstick in 27.

From Left to Right: NYX Butter Lipstick in Hunk, Lancome L'absolu Rouge in 131, Nars Velvet Matte Lip pencil in Damned, Boots 17 Lasting Fix Lipstick in New Black, Kiko Ace of Diamonds Lipstick in 27.
First up NYX and Lancome are both a sheeny finish but still super long lasting on the lips. The coverage can take a bit of work to get even due to the slippy but highly pigmented formula but I don't worry that these colours will end up half way across my face by the end of the day. NYX looks a lot darker and more purple in the bullet but is a bright blue toned pink with a hint of purple and Lancome is a rich Bordeaux red.
Next up the only true matte in my berry collection and one that I went to the ends of the earth to get my hands on, Nars Velvet Matte in Damned. It seems this shade from the collection is limited to certain countries. I got mine from America in the end. It's a stunning blue toned purple that really makes green eyes pop and once this stuff is on, its on. It's pencil applicator makes it really easy to do corrections with no need for liner. It's not too drying on the lips but you do want to ensure they're in tip top condition if you plan on sporting the super matte lipstick as any flakes or lines will be accentuated.


Boots 17 New Black is a super bold colour to wear full strength so I tend to smudge this one out or dab on with fingers Lisa Eldridge style. Sheered out this colour is purply pink with black undertones so super striking and a nod to the inner goth. Again the formula is super long lasting and has a satin finish.
Kiko Ace of Diamonds Lipstick in # 27 is my most recent purchase. My biggest enabler Viviannadoesmakeup worked her magic on me again. It's another great shade for green eyed gals.

Boots 17 in New Black dabbed on with fingers.


Let me know your top Autumn/Winter shades in the comments below!

Thanks for Reading!

Gem :)


Wednesday 15 October 2014

Salted Caramel Blondie Slice


Hi Guys!

I know, I know, you're drooling right?

Get in the kitchen & make these immediately, you wont regret it....well you might if you count the calories, but who does that?

To make these deliciously chewy, chocolately, gooey goodies you need:

For the blondies - Recipe taken from Erins Kitchen
157g Plain Flour
1/2 tsp Salt
1/2 tsp Baking Powder
1/2 tsp Baking Soda/Bicarbonate of soda
113g Butter softened
165g Brown Sugar
4 tbsp Granulated Sugar
2 Large Eggs at room temp
1 tsp Vanilla Extract
150g Dark Choc or Semi Sweet Choc Chips
For the caramel - used own recipe
120g butter
1 tin condensed milk
2 tbsp golden syrup
120g caster sugar
1 tsp sea salt 
For the chocolate topping - used own recipe
125g Dark Choc
125g Milk Choc


Directions for Blondie
Preheat oven to 170c
Grease 9in silicone baking pan
Sift flour, baking soda, baking powder and salt in a large mixing bowl
In a separate large bowl beat the butter, brown sugar and granulated sugar until fluffy
Mix in the eggs one at a time and then add the vanilla
Mix the flour into the butter & sugar mix by hand taking care not to overmix
Fold in Chocolate chips
Spread batter evenly into the prepared pan,
Bake for 25 minutes, taking care not to over bake.
Once base is cooled you can prepare your filling.

Erens caramel filling recipe looked a little too wet for me, I prefer a more chewy caramel that sets and can be sliced through neatly so I used a more traditional millionaire shortbread caramel filling recipe. See above for ingredients.

Directions for Caramel
Put all filling ingredients into a saucepan, heat gently on low low heat until sugar is melted then bring to the boil. Stir constantly to avoid the mixture catching on the base and burning. Boil for 4 to 6 minutes until a nice rich caramel colour. Allow to cool slightly and then poor the mixture onto the blondie base spreading evenly.

Allow to cool and set in the fridge. When fully cooled and set, melt the chocolate using a heatproof bowl over a pan of gently simmering water or in the microwave.
Pour melted chocolate over the caramel and pop back in the fridge to set.

Slice. Eat. Enjoy

Thanks for Reading!


Sunday 12 October 2014

Frizz Busters


Hi guys!

Today we are talking all things frizz-fighting. Frizzy hair is something I have always, and no doubt, will always, have to deal with. My hair is naturally curly and quite porous so it's pretty much always thirsty for moisture. I need products that can satiate that thirst and keep providing it with moisture throughout the day.

I wont talk about shampoos etc today as I am a shampoo floozy and have not found my holy grail as yet. I've found some goodies, but nothing to write home about but as soon as I do, you'll be the first to know!

I do, however, have a pretty monogamous relationship with my post-wash products so that's what I'll be sharing with you today. These products do change depending on whether I plan to wear my hair straight or curly, but I'll get to that.

So first up, lets start with towel dried hair (and when I say towel dried I mean genty pressed using a towel, not vigourously rubbed, no arm workout required here. We frizz-prone gals need to be as kind and gentle to our hair as possible whether its wet or dry.
First product to hit my locks is a leave in conditioner, like I said I need as much moisture as possible for my oh-so-thirsty hair. For this I use Dove Colour radiance leave in conditioning spray. This leave in spray can be used on wet or dry hair and is a sort of milky consistency. It leaves hair feeling nourished and not too wet, important for if you are using on dry hair. It sinks in pretty quickly so I also like to give the ends of my hair a quick spritz every night before bed.

Next I add an oil to nourish and add shine, for this I use Moroccanoil Treatment. I love the feel of this treatment oil, it leaves my hair nourished and very smooth. It also claims to reduce drying time, which is  fantastic news for me as I have lots of hair!

The penultimate step in my four-step system is a cream, I find cream helps to seal in the LIC and the oil. For me, this is the step that changes dependant on whether I want a a natural curl, a more defined, tight curl or whether I'm going to use the straighteners.
If I'm reaching for the straighteners I use Kerastase Nectar Thermique for dry to very dry hair, this cream has built in heat protectant so perfect for use with irons or blowdryers.
For a more natural finish or sometimes also for use with my straighteners I use Brazillian Blowout Acai Daily Smoothing Serum. Now although this product is called a serum is is definitely more of a cream formula, this stuff rocks. If you can style your hair with a blowdryer then you need this serum/cream in your life as it will leave your hair silky smooth, protected from heat and UVA/UVB and you get a whopping 240ml for $40.
Lastly for a more defined curl with a bit of extra "boing" I use Moroccanoil Curl Defining Cream, this stuff is amazing, it really works to give those with lazy curls a bit of structure and discipline. It leaves no crunchy residue (provided you use it correctly and don't go overboard) and can be reactivated on second or third day hair with a bit of water.

For extra heat protection I reach for the tresemme heat styling protectant spray, especially if I am going over second or third day hair with the straighteners.

When all that is applied and may hair is fully styled I use Dove Pure Care Dry Oil to smooth any flyaways and add that extra bit of shine and as it's a dry oil it doesn't weight hair down or leave it looking greasy and you can use it in the ends every day until your next wash for a daily moisture injection.

Let me know your ultimate frizz fighting products in the comments!

Thanks for reading :)

Wednesday 8 October 2014

When Life Gives You Lemons...


Hi Guys!

I have had Lemons coming out of my ears of late so today I have a recipe for you for Lemon Curd & Pistachio Butterfly Cakes with Sweet Mascarpone.

For this bake I combined a few different recipes to create my own final product, the results are a soft bouncy sponge cake with a sweet, tangy lemon filling and a creamy refreshing mascarpone to counteract the tartness of the curd and a bit of nutty crunch care-of the pistachios.

Firstly, the day before baking the cupcakes, I made a batch of Lemon Curd using Curtis Stones Recipe, find it here. This makes a good two jars worth of delicious lemon curd but you should only need one for one batch of cupcakes as per the Recipe below from The Hummingbird Bakery Cookbook.
I used their Vanilla Cupcakes  recipe for the sponge element of my cakes.

120g Plain Flour
140g Caster Sugar
1 1/2 Teaspoons Baking Powder
A Pinch of Salt
40g Unsalted Butter (room temp)
120ml Whole Milk
1 Egg
1/4 Teaspoon Vanilla Extract

Preheat the oven to 170°C (325°F) Gas 3.
Put the flour, sugar, baking powder, salt and butter in a freestanding electric mixer with a paddle attachment (or use a handheld electric whisk) and beat on slow speed until you get a sandy consistency and everything is combined. Gradually pour in half the milk and beat until the milk is just incorporated.
Whisk the egg, vanilla extract and remaining milk together in a separate bowl for a few seconds, then pour into the flour mixture and continue beating until just incorporated (scrape any unmixed ingredients from the side of the bowl with a rubber spatula). 
Continue mixing for a couple more minutes until the mixture is smooth. Do not overmix.
Spoon the mixture into the paper cases until two-thirds full and bake in the preheated oven for 20–25 minutes, or until light golden and the sponge bounces back when touched.
A skewer inserted in the centre should come out clean. 
Leave the cupcakes to cool slightly in the tray before turning out onto a wire cooling rack to cool completely.

While the sponges are cooling you can prepare your sweet mascarpone. For this you simply need:

1 Tub Mascarpone
3 Tblsp Icing Sugar (or less, taste after 2 to see if sweet enough for you, I'm a sugar fiend!)

Simply whisk mascarpone until soft, add the icing sugar and whisk again until completely incorporated. Refrigerate your mascarpone until your sponges are completely cool and ready to assemble.

When sponges are completely cooled, take a small sharp knife and cut a cone shaped segment of sponge from the centre of each cake and cut in half to create the butterfly wings. Fill the holes to the top of each sponge with a good dollop of lemon curd then pipe or spoon a dollop of sweet mascarpone on top of that. Take your butterfly wing pieces and place them pale side down onto the mascarpone dollop and then sprinkle your chopped pistachios between the wings.

Eat, Enjoy.

Feel free to share any of your favourite recipes that involve Lemons as I still have a good few left!!

Thanks for Reading!


Sunday 5 October 2014

The Only Black Eye Pencil You'll Ever Need


Hi Readers!

So....great news! I have finally completed my mission to find THE BEST black eye liner. I wanted something that was truly black, easy to work with, soft and blend-able, has staying power and wouldn't transfer from my water line.

Well by golly I think I've found it...

I have a fellow beauty blogger to thank for this discovery. Sharon from Sharon The Makeup Artist blog has used this eyeliner many times in her Youtube makeup tutorials but I was working my way through a vast collection of black liners already, testing and trialing and none of them were coming up to scratch, all absolutely fine for smudging in a smokey eye etc but none of them had the staying power when it came to tight lining that upper water line. They would all sting my eye when applied and therefore eventually transfer onto the bottom water line due to the fact that my eyes were watering so insanely.

So finally I decided to listen to the expert and I purchased the Eye of Horus Goddess Smokey Eye Pencil. Eye of Horus products are made with natural ingredients and designed for people with sensitive eyes or those who prefer to use natural products that are paraben free and not tested on animals.


Top: One swipe, no smudge. Bottom: One swipe smudged
I got absolutely no stinging with this eyeliner, no tearing or sensitivity at all and its the smoothest formula, a pleasure to apply and super comfortable to wear. it leaves no gritty feeling behind i your eye and caused no redness or irritation in the slightest. Along with all that fabulousness, it has staying power that you will not believe (will definitely require a good oil based cleanser to remove) and is truly black. its a matte finish with no glitter or shimmer in sight so a really natural look can be achieved or alternatively its buildable (for a short time, so work quickly!) and blendable for a vamped up smokey eye effect. You can use the blender sponge tip on the other end of the pencil for quick smudging. It also dries with a good amount of flexibility so you don't get and cracking when it sets as you can see from the swatch below.

Top: Several swipes built up, no smudge. Bottom: several swipes built up and smudged.


Overall I'm more than impressed with this eye pencil and couldn't recommend it more and since dicosvering this I will definitely be trying some other products from the Eye of Horus range.

If you have a holy grail eye pencil I should know about please let me know in the comments!

Thanks for Reading!


Monday 29 September 2014

Chanel April Dupe!!


Hi guys!!

I thought I'd let you in on an awesome dupe for Chanel's Le Vernis Nail Colour in # 533 April. This colour featured in my Top Nail Colours for All Seasons post and I've recently found an EXACT drugstore dupe in Rimmels Salon Pro # 707 No Need To Blush.
I can see very little colour difference in these two nail polishes, if I had to be picky I would say that Rimmel leans slightly deeper in the swatch but I think thats mainly to do with the texture, while Chanel is quite a thin liquid-like polish, Rimmels is slightly thicker therefore requires less layers to build a rich coverage and in this shot both hands have 2 layers. Rimmels brush is amazing, its huge and you can do one nail in 2 swipes and its tapered to mirror the cuticle curve so you are left with a great shape and makes painting the left hand (or right if you are left handed) much easier!
The finish on these is identical and both have good shine and longevity.


Pictured above: Chanel on the left, Rimmel on the right. 


Let me know any of your high end dupes.

Thanks for Reading!


Sunday 28 September 2014

Kalgoorlie Cup Outfit & Makeup OTD

Hi Guys!!

Last weekend was Kalgoorlie cup Race round, the one time in Kal where it's ok to get all glamour-puss, so I thought I'd do a bit of an Outfit & Makeup OTD for you.

Makeup


Bobbi Brown Long-wear Even finish Foundation mixed with a bit of Chanel CC cream to darken it up
Bourjois Healthy Balance powder
Laura Mercier Matte Radiance Powder in Highlight 01
Rimmel Lasting Finish Soft Colour Blush in 170 Genuine Plum
Estee Lauder Shimmer Powder in 01 Pink Shimmer (over blush)
NYX Blush in Taupe (contour)
Revlon Lip Butter in Sorbet

Eye Makeup:

Nars Pro Prime
Benefit Longwear Powder Shadow in Pause for Applause all over the lid and lower lash line
Napoleon Perdis Colour Disc in High-Voltage Violet in the centre of upper and lower
It Cosmetics Naturally Pretty Palette colour in Iconic to define the outer v and into crease
Too Faced Glamour Dust in Glampire pressed all over the lid and lower lash line
MAC Prunella Eye Kohl on upper and lower lash line and water line
Maybelline The Falsies Big Eyes Mascara


Nails - Essie Play Date

Outfit:                                                   
Closet Dress                                                                    
Morgan & Taylor Fascinator
EOS Wedges
Kmart Bag
ASOS beaded bracelet
Lovisa Necklace


Thanks for Reading!!

Wednesday 24 September 2014

This anti-ageing treatment has four legs and nine lives


*Disclaimer* This post is not to be taken too seriously. It's just a bit of fun. 

My Cats Sid & Daisy (I warned you this was coming!) are my babies and they bring me so much joy. Sid is a cuddler but only at night, in the day he’s too cool for his mum. Daisy is sensitive soul; she likes the quiet confines of behind the sofa or bird watching through the windows. 
Having animals around makes a home complete and nothing sooths my soul more than listening to Sid purr away next to me in bed at night.
  
More & more research is being done into the benefits of pet ownership and studies show that interacting and playing with your pets can reduce stress and aid healing due to the chemical reaction it has in our bodies.

Petting your cat, dog, guinea pig, or whatever your furry (or scaly) friend of choice, has been proven to release the hormone oxytocin, which reduces stress, and decreases the production of the hormone cortisol, which your body releases when you are stressed.

So how is stress affecting my body, you may ask?

We know stress is bad for our health, and in particular our heart, but how does it effect the aging process? I won’t get too scientific on you but if you are interested see the journal published on plosone.org here to clue yourself up.

To cut to the chase, stress has been shown to impact our bodies on a cellular level therefore resulting in accelerated biological aging. Considering the beauty industry is quite largely based around the prospect of anti-ageing I thought it would be interesting to consider other ways in which we can help halt the ageing process that can also benefit our health and well-being in other ways. By reducing stress in our lives we reduce the risk of accelerated ageing.

The benefits of pet ownership are so numerous and not just for our physical health but our mental well-being also. ReachOut Australia has published an article on the health benefits of pet ownership, read it here 

Now I’m not telling you to head straight down to your local pet shop and make a panic pussy purchase, I’m just saying consider the benefits of a canine companion or a feline friend. If you are not in a position to own a pet yourself you can offer to walk your neighbors dog for them or volunteer at your local animal shelter for your daily dose of “me-ow-dication” (oh dear). Fostering and adoption are also great ways to introduce pets to your home and save an animals life, the rewards are endless.

So next time your feeling under the pump at work and watching those crows feet deepen and those eye bags droop another millimeter ditch the drugs, keep calm and pet your cat. Your reflection will thank you for it.

Thanks for reading


Sunday 21 September 2014

Estee Lauder Perfectionist Youth-Infusing Makeup Review


Estee Lauder's brand new "youth-infusing" foundation hit the shops here a couple of weeks ago so I decided to give it whirl. It's a foundation with the added benefits of their perfectionist serum, said to brighten, tighten and hydrate and as I write this today with the mother of all hangovers I can safely say it really works wonders for even the most tired looking complexions.
For me, this foundation really is perfection, the texture is silky liquid that blends beautifully and sets dry to the touch. It's a satin finish medium coverage foundation with a super fresh glow that's not greasy or wet looking, just radiant and youthful. No highlighter needed here!
I've played around with a few methods of application and I think so far my favourites have been a flat top kabuki for a sheer finish or the beauty blender for a more medium coverage. I didn't find this went on as smoothly with fingers and almost sheered out a little too much for me. I have quite a lot of redness around my nose and chin so like to build up coverage in those areas and when I did so using fingers the product tended to crease and settle so a patting motion was definitely preferable over a rubbing motion. I do find this foundation can settle a little in pores and fine lines so requires a good amount of blending but the finish is totally worth that extra bit of work.


The colour range in this line is pretty reasonable with 16 shades available online here in Australia (although I don't think all shades are available in store) covering warm, cool and neutral skin tones.
The formula is oil and fragrance free so suitable for most skin types. I have an oily skin type and find that this foundation lasts well on me with a little powder through the T zone and if I wanted it to last even further, a little primer and some setting spray would easily see you through 12 to 16 hours.

Overall I am really impressed with this foundation, it's a real work-horse. My new favourite for sure.

Have you tried this foundation yet? I'd love to know your thoughts.

Thanks for reading


Wednesday 17 September 2014

My Top 10 Makeup Brushes


Hello Readers!!!

Today I thought I would share with you my top 10 makeup brushes, these are the ones I reach for regularly and that really perform.

Starting from the top going clockwise:

Sigma F80 Flat Top Kabuki. This is a real gem of a brush for pretty much any foundation. Its super soft and dense and leaves your makeup looking flawless without a streak in sight. As with any foundation brush application, I do like to pat over it with my finger at the end just around my nose and upper lip where I can get a little flaky.

Sigma P82 Precision Round. I use this brush for under eye concealer and for concealing redness around my nose and chin. I find it imitates a finger tip well and has the same density of the F80 for real flawless blending.

Ecotools Angled Liner Brush. I rarely use this brush for liner, I much prefer a fine liner brush for that which ill talk about next. This brush I use for my brows, it's got a super fine edge for precision brow shaping and imitating brow hairs with the product of your choice. Its very stiff but at the same time the bristles are soft and a pleasure to use.

MAC 210. The finest liner brush I've come across and zero fraying.....job done!

Beauty Blender. Not technically a brush but an absolute essential for any makeup lover kit. This little egg shaped sponge blends, blurs and buffs even the thickest of foundations and leaves them with a dewy, youthful glow due to the fact that you use the beauty blender slightly damp. Immerse it in water until it doubles in size and squeeze out the excess using a towel, tap either end into your desired foundation then bounce and roll this little beauty over your face for flawless perfection. The pointed end is particularly good for getting in those hard to reach areas around the nose and can even be used to apply concealer under the eye.

Suqqu Cheek brush. *heavens open and angels sing* This....brush....is......so.......SOFT! Nicknamed the kittens paw by makeup guru Lisa Eldridge, this brush is softer than words can describe and its an absolute pleasure and luxury to use. It's inexplicable softness is not its only value however, it also achieves an airbrush like finish when used for blush or bronzer application and is small enough to use to contour also. It's a multi-purpose powder brush if you ask me. It's not the easiest to clean and is also on the pricey side but if you ask me its worth every penny..that's what birthdays are for!

The brush that comes with Maybelline Lasting Drama Gel eyeliner. Again I don't tend to use this brush for its designed purpose. I have, and it works fine, but nothing compares to my MAC 210. I use this brush for pinpoint/spot concealing. It has the perfect stiff, dense tapered head that you can pack on concealer just where you need it and blend it out perfectly. It is also good for softening out a pencil liner. Best of all...it's free!

Real Techniques Setting Brush. One of the few brushes I do actually use as intended, to set my concealer. Mainly my under eye but also around the nose. I have two of these and I tend to keep one for under eye use with my Laura Mercier Secret Brightening Powder (it has a slight shimmer so I don't want to transfer that to my nose area) and one for use around my nose and to set any pinpoint concealing. Its also a great contour brush and the dual fibre helps to avoid any heavy-handedness.

Real Techniques Blush Brush. Another brush designed perfectly for purpose. Real Techniques really did hit the hammer on the head with their collection of brushes, Ive yet to use one I don't like. Again the dual fibre allows the perfect amount of product to be applied the the face and the tapered shape means you place the tip in the product, I use for blush and bronzer, and use the rest of the brush to seamlessly blend. I use this brush for very highly pigmented blush that I might get a bit carried away with and use my Suqqu Cheek Brush for the lighter, less pigmented colours. The Real Techniques brushes are also an absolute dream to clean, fuss free and fabulous.

L & Y 217. I discovered this brush when trawling Ebay for a discontinued NARS brush I was pining for. It looked like a great shape (clearly a replica of the MAC 217) and it was fantastically cheap (AU$6.50 & free delivery), how could I resist. This brush also has a brilliantly designed handle, with a indent where you hold it and a very swish looking tan wood effect finish. This brush, in my opinion, trumps the MAC 217 and the Sigma E25, both of which I find shed and loose their shape after a few washes, I also find the MAC 217 rough and sharp and I really don't enjoy using it. The L&Y 217 is super soft and has a superior oval shape, perfect for crease shading, blending and all-over lid application and defining. I have two of these brushes now and they both look as good as new wash after wash. I am extremely impressed.
They can be purchased here, it's an Ebay shop so i know very little about the company or how and where the brushes are manufactured. I have tried googling but to no avail so shop at your own discretion. For $6.50 these brushes are absolutely fantastic value, heck, for the $40 odd you pay for a MAC brush these are great value.

Let me know your favourite brushes in the comments below, I'd love to know!

Thanks for Reading


Sunday 14 September 2014

Skincare Series Edition 2 - Makeup Removers & cleansers


Welcome to Skincare Series Ed2. Today I'm talking my current makeup removers and cleansers.
I love nothing more than taking my makeup off at the end of the day, I enjoy it almost as much as putting it all on...It's kind of like taking your bra off at the end of the day, am I right ladies?!
I'm a double-cleanse kinda gal, I'll use a cleansing balm or oil to remove my makeup and then head in with a gentle but effective lotion or milk to cleanse my skin.

As I've told you previously, I have oily skin, prone to breakouts, dehydration, redness and reactivity. I try to avoid using alcohol and fragrance but I don't mind it in small quantities in cleansers as they don't stay on my skin long enough for it to be a problem

So I'll start my routine by removing my eye makeup. If I've had a heavy eye makeup on that day I'll remove the eye makeup first with a micellar water like Bioderma Sensibio (name now changed to Crealine H20 Solution) or Garnier Micellar Water. These are very comparable products but Garnier is a lot easier to get your hands on, and if your shopping in the UK or Australia, a lot more affordable. I do only tend to use these products for removing eye makeup, unless I'm having a really lazy day, then I will use it to remove my makeup. I find the Garnier Micellar water to be just as effective at removing eye makeup but perhaps not as "slippy" or moisturising as the Bioderma. Both are fragrance and alcohol free so great for all skin types and the sensitive eye area. This is important for me with this product as you don't wash it off, you apply with a cotton pad and if you used it to completely cleanse the skin you can then follow on with your regular toner/serum/moisturiser. No need to rinse. Ultimate convenience.

Ill then remove the rest of my face makeup with a cleansing balm or oil. I use Oskia Renaissance cleansing gel, using dry hands and a dry face i work the product into my skin until it turns into an oil, ill then wet my hands slightly and work the product some more until it forms a milk and then flannel off. The same process applies for Dermalogica preCleanse.
Both products are quite fragranced and contain alcohol, although I've not found that this has bothered my skin at all as the product is on for such a short time. If I was doing a really deep clean with massage and leaving the product on longer I would look for something without fragrance & alcohol for me. The main job I want these products to perform is to remove my makeup and they both get top marks for that.

So when my face is free from makeup I'll then go in with a gentle cleanser. I like to look for calming, moisturising ingredients in a cleanser and avoid any harsh detergents that might strip my skin of its natural oils. When I first found out I had oily skin I went straight for the acne fighting, oil stripping products and all that did was make my skin more oily. Since I've been using gentle, hydrating ingredients my oil flow has never been more controlled.

I like Alpha H Balancing cleanser (anything with the word balancing in the description tends to get my attention), this is a light lotion containing Vitamin E and Aloe Vera which claims to balance the skins natural PH level.
In the colder, winter months when I find my face really dries up, I like to use A'kin Rose & Geranium Pure Creamy Cleanser & Toner. This product states it's for normal, dry or sensitive skin and I picked it up as soon as my skin started turning as the weather got cold. I had previously tried Pai Camellia & Rose Gentle Hydrating Cleanser and I find them very comparable. The A'kin is a little thicker & contains shea butter which can be a tricky ingredient if you have large open pores that can get clogged but neither leave a film on the skin after removal, despite them both containing various oils. Pai is quite a bit more pricey, in a smaller bottle and difficult for me to get my hands on which is why I tend to use the A'kin more readily. I would certainly repurchase both though.

The last product on my list today is Neutrogena Extra Gentle cleanser. Neutrogena is one of my favourite drugstore skincare brands, its reasonably priced, easily accessible and delivers results. Neutrogena makes a real effort to provide fragrance free, sensitive skin products, which I love. This Extra Gentle Cleanser is exactly what it says, its a gentle, effective light lotion (slightly lighter than the Alpha H Balancing Cleanser) that removes dirt and impurities with a "non soap formula". It's fragrance free and again leaves no pore-clogging film when rinsed off and leaves your skin feeling fresh and soft, not tight or dry.

So those are a few of my favourite cleansers and makeup removers. I'd love to hear your favourites so please leave me a comment below.

Thanks so much for reading

Wednesday 10 September 2014

Top 5 Nail for All Seasons

From Left: Orly Harmonious Mess, Chanel April, Crabtree & Evelyn Sky/Blue Pastel , Butter London Marrow, Butter London Sprog
With Spring just dawning here in the Southern Hemisphere and the first signs of Autumn showing in the North I contemplated my top 5 nail colours for those tricky transitional months where the weather has not quite made up its mind. 


First up is Orly Harmonious Mess, this a stunning lavender colour and the formula of Orly polish is great, really opaque and a smooth finish. I also use Orly Bonder base coat. 
Next up is Chanel...need I say more? The shade April is a stunning muted, almost cloudy berry colour, quite difficult to portray in the swatch but in the flesh...stunning! 
Crabtree & Evelyn are fairly new nail polish discovery for me but they do not disappoint. This sky blue is the perfect fresh clean spring shade but I think they can also be carried through to Autumn and winter due to the cool undertone and crisp clean colour. 
Butter London Marrow is the darkest of my selection  but still colourful enough to wear in those awkward transitional seasons, it's a great neutral purple shade that looks super chic on all skin tones. 
Finally Butter London Sprog, a bluer, less pastel version of Orly Harmonious Mess, reminds me of cool calm waters or autumn shower rain drops.

I'd love to hear what your top nail colours are for all seasons, please leave me a comment!

Thanks for Reading

Sunday 7 September 2014

Snow White & The 7 Tips for Fair Skin Makep


In recent years I have taken a step away from the faux glow and embraced the pale, the main reason for this being…I’m lazy. I’m also not a girl who keeps a separate summer and winter foundation shade due to the fact that the amount of time i’m actually tanned in a year is so slight…blink and you’ll miss it, it would take me about 10 years to use up the summer shade.

So for the most part of the year I’m your alabaster, as pale as foundation goes kinda shade and I’ve been experimenting with lots of products & techniques that suit my skin shade and my cool undertones and thought I'd share them with you. 

*disclaimer* 
I am not a makeup artist or professional, just simply sharing with you tips and products that have worked for me

1. Foundation:

Don’t try to darken your skin with the wrong colour foundation, instead match your base to your neck and warm the skin gradually and naturally with a bronzer later. Aim for a neutral foundation with no strong undertone to even out any redness or blue veins that can both be more prominent in fair skin.

Go for a light base to avoid looking ghostly and one-dimensional and cover any unwanted marks & blemishes with a concealer.

Try -

Bobbi Brown Skin foundation
Bourjois Healthy Mix foundation 
Laura Mercier Oil Free Tinted Moisturiser

TOP TIP:
Add a white foundation like Chanel le Blanc de Chanel or Face Atelier Foundation in Zero Minus with your existing foundation if it is too dark.


2. Concealer:

Match your concealer perfectly to your base to avoid looking muddy or patchy
Avoid brightening or highlighting concealers for blemish covering, as this will accentuate the blemish.

Try - 

Bobbi Brown face touch up stick
Laura Mercier secret camouflage concealer 
Bourjois Healthy Mix Concealer 

Only conceal where you need to under the eye, if you don’t have bags or dark circles to conceal then don’t use concealer.
A peachy toned concealer will conceal blue circles

Try -

Mac pro longwear concealer 
Bobbi brown creamy corrector & concealer
Maybelline Age rewind


3. Powder:

Powder is another tricky one for us fairer skin gals. I find the only kinds I like to use these days are the translucent ones so they don’t add any extra colour or coverage to my base.

I only powder where I have used concealer and in any oily areas of the face to avoid shine developing throughout the day. If you don’t need powder, don’t powder, to keep a youthful glow in the skin.

Try –

Laura Mercier Loose Setting Powder
Jurlique Citrus Silk Finishing Powder
Bourjois Healthy balance pressed powder 
Laura Mercier Secret brightening powder*

*To set under eye concealer. This powder is pure magic. In the packaging it almost looks glittery, but none of this shimmer/glitter transfers to the skin and it sets concealer beautifully whilst brightening the area.

TOP TIP!
After using powder under the eye, spray a setting spray on your powder brush and press this onto the under eye area to set the make-up and diminish the powdery residue to avoid looking dry or dull. I use Urban Decay All Nighter Setting Spray.


4. Bronzer:

Bronzer is a fair skinned gals best friend, it can give your skin a beautiful glow and ad some shape and dimension to your face. Avoid anything too red based and aim for a shade 1 or two shades darker than your foundation for a natural buildable glow.

Try - 

Rimmel Sun Shimmer bronzing powder
Bobbi Brown Bronzing Powder
NYX Taupe blush for the perfect contour colour


5. Blush:

Blush is essential. I don’t know about you but when I have put my foundation on I look like I’ve just dragged myself off the set of the walking dead, but a swipe or dab of your favourite blush will soon bring you back to the life of the living

Try - 

Rouge Bunny Rouge Original Skin Blush in Gracilis 
Fusion Beauty Sculptdiva Blush in Haute
Zoeva Luxe Colour Blush in Rush Rush 
Elizabeth Arden Beautiful Colour Radiance Blush in Pink Pop 07


6. Eyeliner:

I mostly keep black eyeliner for tight lining, Smokey eyes and cat flicks

For a more subtle, softer look you could opt for a brown, bronze, purple or navy liner depending on your colouring or preference. This way you still get definition and avoid looking too harsh.

Try –

MAC Eye Kohl in Prunella
MAC Eye Kohl in Teddy
Almay Intense i-colour in 004 Raisin Quartz


7. Lips:

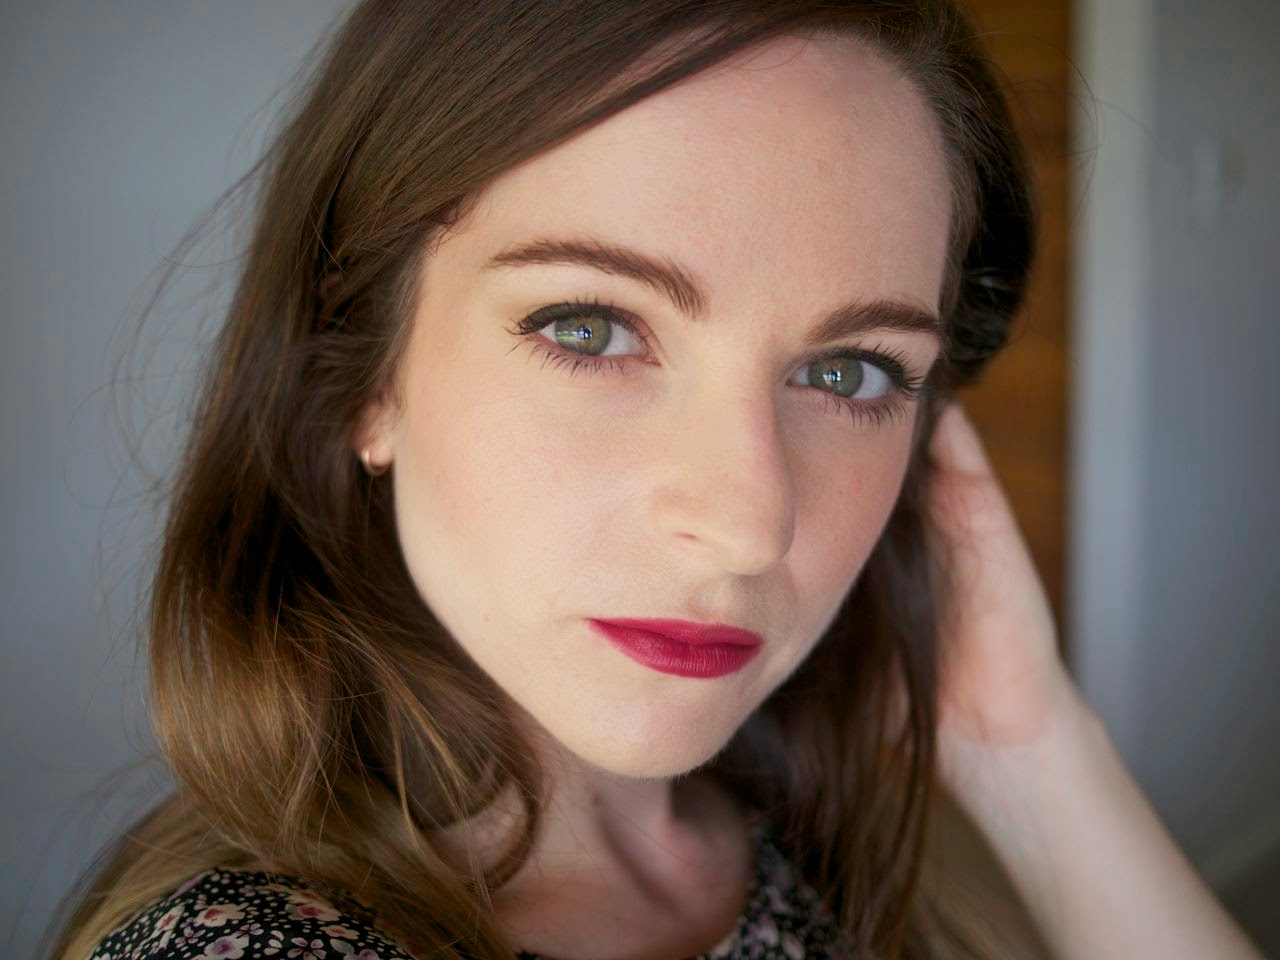
I think a bright lip looks amazing on fair skin and can really bring the face to life. Find the best shade to compliment your colouring.

Try - 

Pixi Shea Butter Lip Balm in Ripe Raspberry for a more sheer bold lip
Bourjois Rouge Edition Velvet in Ole Flamingo
Lancome Rouge in Love in 170N
Max Factor Colour Elixir in Vibrant Pink


Recap: Top tips for achieving a wide-awake pale face

Don’t try to change the colour of your face skin with foundation, match your foundation with your neck and décolletage and warm it up afterward with bronzer if you need to, this also means you can avoid having to take your foundation down your neck.

Find the perfect blush shade for you. Blush is the pale girls secret weapon and can even work to brighten your eyes if you find the right shade.

Have a light hand when it comes to bronzer and build up slowly. Don't forget the neck!

Find a bright lip colour that compliments your colouring and brightens your complexion

Line the eyes with a brown, purple, bronze or blue liner for a softer defined effect

Use a cool toned bronzer or contour powder to shape the face after applying foundation and follow with blush.


I'd love to know if you have any top tips for pale sin makeup or any favourite products you have that work well for fair skin. Please leave me a comment below.

Thanks for Reading